Review and How To Socrative

So first off, so my follower(s) for the long delay between post. Since the last post: My wife gave birth to our first kids, yes kids; we then moved across the country. To top that all off, I started a new job. Originally I had been interviewing for regular classroom teaching positions. Once again, it’s all about who you know though. An old friend of mine told me of a technology trainer position that was opening up in his district. After much editing of resume and long delays with their HR department I was hired. Yes I have my dream job. So far, it’s been quite nice.

but on to the real reason why you are here. Socrative is a student response system. I remember years ago (3 years ago to be exact), my wife talking about student response clickers her school bought. The only problem is that they were difficult to use and required proprietary software. On top of that they were expensive meaning that they only had a few sets for the entire school. Socrative eliminates that problem. Using a smart mobile device or a computer browser, Socrative puts a response system into every students hand. If I were in the classroom today, I would be using this to facilitate my warm ups as I teacher can create a multiple choice, true/false, or short answer quiz and have the students take it when they walk into class. On top of that, Socrative then grades the quiz (mc or t/f, short answer you still have to grade yourself) and spits out a nice Excel spreadsheet of scores for you. The best part about this system, FREE. So take a look at a training video explaining Socrative I put together for my application to my current job.

Power On!
Review and How to QR Codes

Review

For this post we are getting both a review and tutorial on QR codes. At least I’m going to share how I have implemented them in my classroom recently. QR codes began as a tracking device for auto manufacture. With the rise of smart mobile device (smartphones, iPod Touch, iPad, other tablets)(SMD), they can be utilized in the educational setting. The code allows you to link a website, 160 characters of text, phone number, SMS, or contact information on a scan able item.

I’ve used QR codes once and I have another lesson set up to use them again soon. So far I’ve implemented them gallery walk style. When we were studying World War I propaganda, I found the posters I wanted the students to study then created a Google site with those posters. I then created a QR code that sent the students to the link to look at the posters individually. This proved beneficial for me as my printer doesn’t have color ink, color being critical for propaganda. In addition, instead of creating a PowerPoint where every student had to go at the same pace it allowed the students to go at their own pace.  They could have just visited the website, but the QR code isolated each piece of propaganda as a small chuck. This system also opens up differentiated instruction possibilities. For instance, when reading a document you can put a code on for students that could provide different scaffolding tools like word definition. You can specify to students what codes they need to scan or what codes that they don’t need to do. The next lesson I’m using QR codes with will be examining the effect of World War I on African American life in the U.S. For this lesson, instead of creating a site, I’ve linked to codes to other sites and the students have to take notes and report back. This negates the need for a computer lab, but still allows students to access outside material using their smart mobile device.

The students seem very receptive to the process. They liked the ability to get up, walk around and go at their own pace. For the few students who didn’t have an SMD, they were able to share with another student who did have one and still accomplish the task.

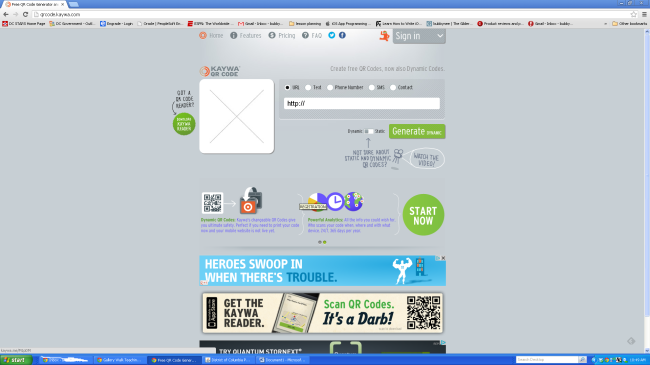
The process is rather simple. There are several QR code generating sites. I use www.qrcode.kaywa.com to generate mine. This site gives you the option to create either free static codes, so once they are created the code can’t be altered. You can also do 5 free dynamic codes, or more with a paid monthly subscription. Dynamic codes give you the ability to alter the destination of the code. They also give you the ability for analytics, but these are mostly geared towards businesses.

There are numerous other ways codes can be utilized. I’ve read of teachers putting them on worksheets to get the answers for previous homework assignments. I’ve seen a Periodic Table of QR codes. And this website has even more ideas.

How To

Step 1: Decide what you want to codify.

Step 2: Go to www.qrcode.kaywa.com

Image

Step 3: Create the code.

Step 4: Right click on the code and select copy

Image

Step 5: Insert QR code into Word document and print

Image

Step 6: Post and have fun

Power On!

How to Guide: VoIP Phone to document parent contact.

One of the things I hate doing most is trying to keep track of my parent contacts. The process of trying to record whenever I call them and what I talk about can be tedious. The point of this how to guide is to use an old cell phone that doesn’t have a cell phone plan, a Google Voice number, and an app called Groove Ip to set up a phone and a number that will automatically log your calls and give you the ability to add notes. The set up uses the Voice Over IP (VoIP), allowing you to do this without a cell phone plan. In order to use the phone, it will need an active wi-fi network at all times. This is a great way to re purpose an old Android phone you have sitting around collecting dust. I wouldn’t be surprise if there was a way to do this with an iPhone or iPod Touch (if heard of ways to do it), but I have not done it myself and don’t know the steps firsthand.

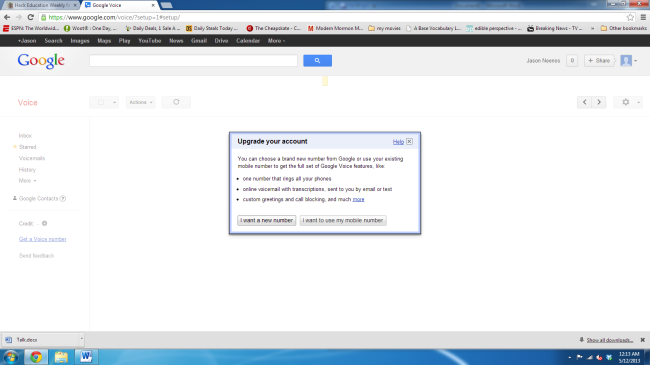
Step 1: Go to www.google.com/voice and log into your gmail account.

Step 2: Accept the terms and select “I want a new number”

Image

Step 3: Type in a forward a forwarding number. Google does this to verify you are in the United States.

Image

Step 4: Click call me now. Google will call you and enter in the code.

Image

Step 5: Select a number.

Step 6: Click the gear icon in the top right corner and select settings.

Step 7: Make sure the “Forward calls to: Google Chat:” is selected and uncheck the forwarding number you entered, otherwise you’ll both numbers will ring.

Image

Step 8: Assuming that your old phone has already had a factory reset and the phone is connected to a wi-fi network, do the initial set up using the Google account you logged into earlier.

Step 9: Go to the play market and download Groove Ip Lite App

Step 10: Sign into Groove Ip with the Google account you set up earlier. You will now be able to make phone calls using your Google Number

The next steps are to set up text messaging

Step 11: Download the Google Voice App.

Step 12: Log into Google Voice and select the phone number you used for your forwarding number for this set up.

Step 13: Select the option “Use Google Voice to make all calls”

Step 14: Skip the voicemail set up

Step 15: When you use the Google Voice App you can now compose text messages.

To add notes for call history.

On your desktop, when you are logged into Google.com/voice, on the left hand side you can see all your call history. Under the more option, you can add a note. I would use this option to record the purpose of the call.

Any questions or get stuck. Email me at howtoedtech@gmail.com

Power On!